Build personalized applications with Slack’s APIs – Part 2
By Alexandra Martinez
In my last post I introduced you to Slack’s API and we built our first Slack application, or app.
Remember, Slack apps help automate all kinds of tasks, like sending messages to a specific channel using webhooks, as we walked through in my last post. Slack apps have access to several APIs in order to read, write, or update any data within Slack.
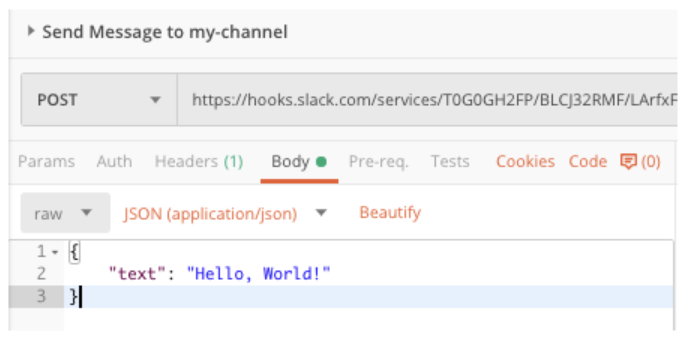
As a quick recap, we used Postman to interact with our new Webhook to send messages to our Slack channel. Postman is a tool used to interact with any API with a very user-friendly interface that helps us send Requests and read Responses without having to know the specific Terminal commands.
Incoming Webhooks are a simple way to post messages from external sources into Slack. They make use of normal HTTP requests with a JSON payload. A Webhook is not exactly an API, but it works very similar since they are using HTTP Requests, a JSON Data Type, an operation – or POST, in this case – and they send back a response.
For this post, we’ll continue to use our Webhook to send messages to our Slack channel, but now we’ll automate it using a Slack “Slash Command”. Slash Commands let users trigger an interaction with your app directly from the message box in Slack. Learn more about Slash Commands here.
Our Slash Command will be useful for us because we won’t have to use Postman anymore to send a message from our Slack app to our channel. Instead, we will just send it directly from any conversation in Slack!
To make this possible, we’ll need an integration that will trigger our Webhook. We will essentially be replacing Postman with a Mulesoft application, which will be called using our new Slash Command in Slack. Thanks to MuleSoft, we can create Mule apps in the cloud! There’s no need to install any program on your computer, and the User Interface is not very complex. Learn more about Mule apps here.
Adding a Slash Command
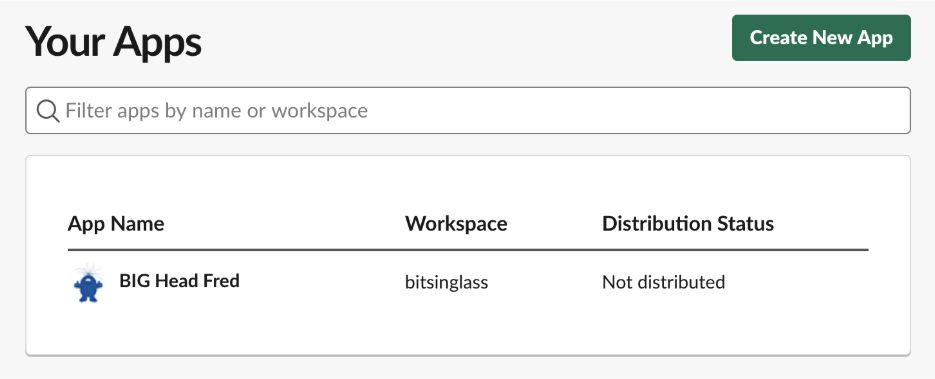
Let’s go directly to our previously created Slack app at api.slack.com/apps and click on the app you want to enhance.
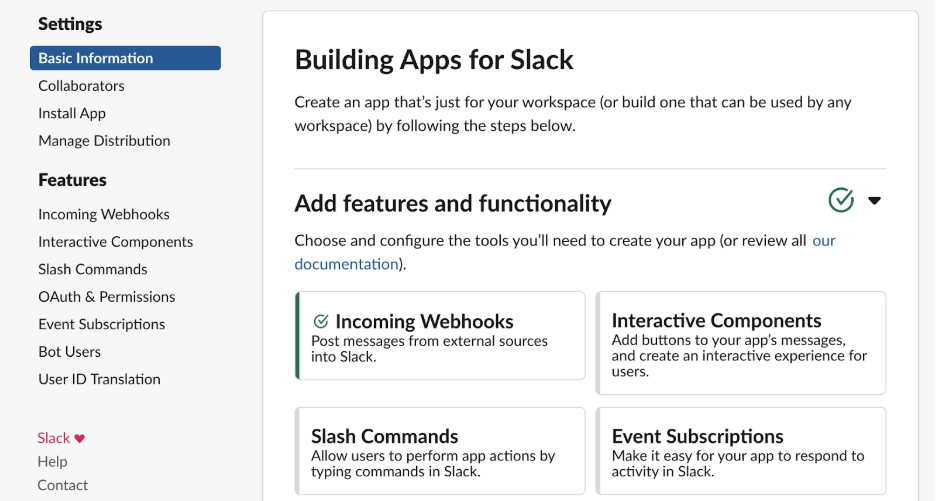
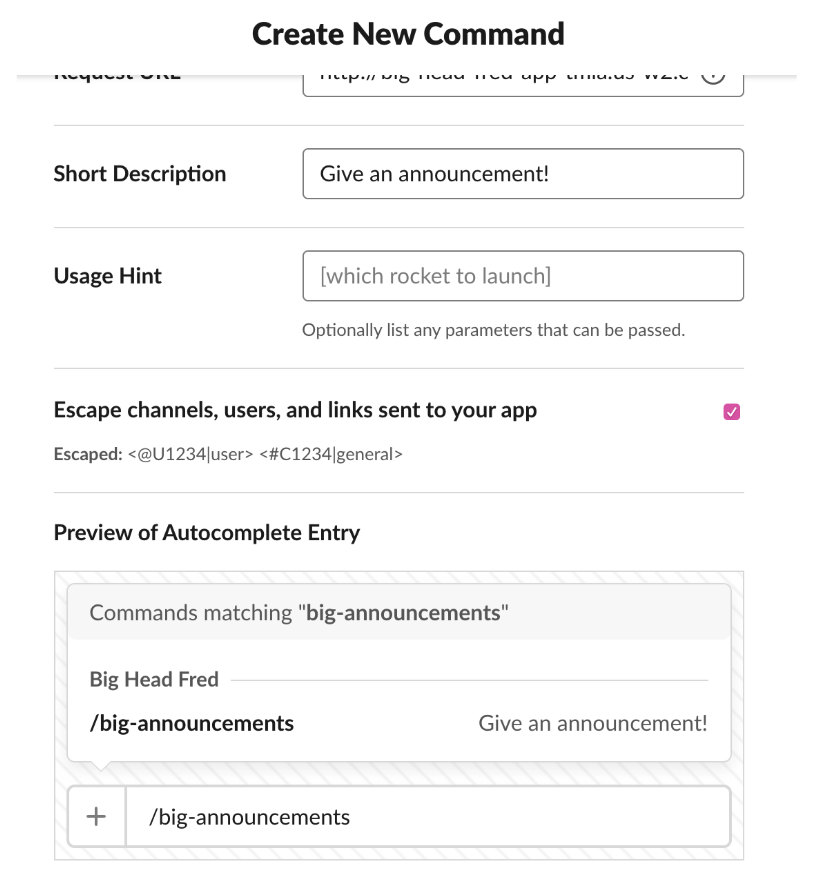
Select “Add features and functionality”, click on the “Slash Commands” button, and select “Create New Command.”
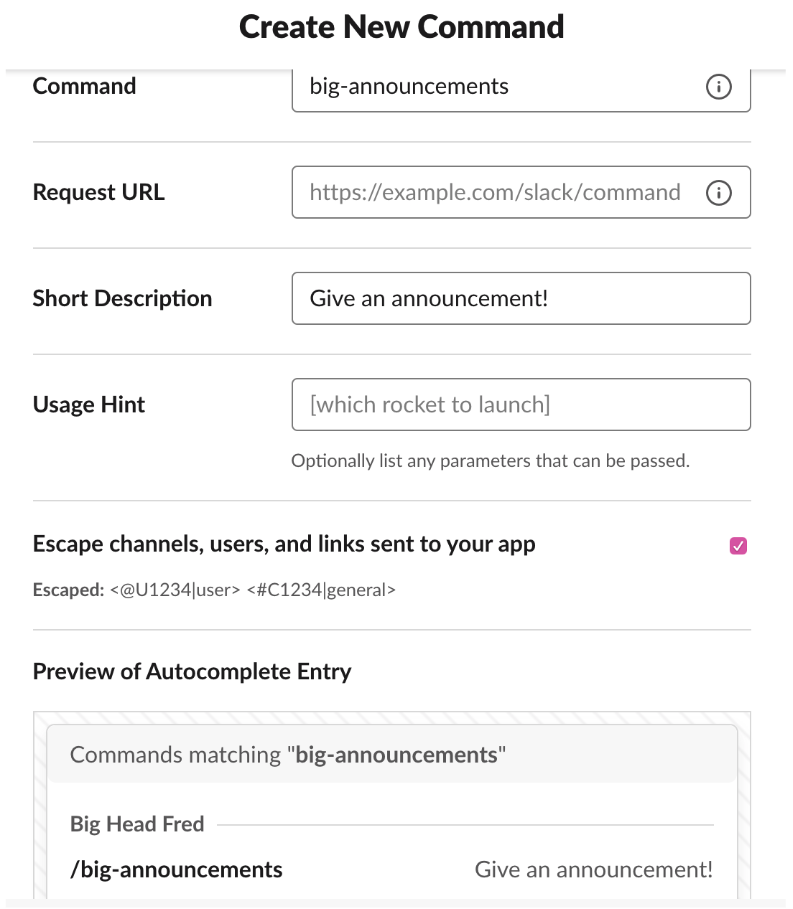 You’ll notice we’re being asked to provide a Request URL. This is not the same URL that we used to connect to our Webhook. This needs to be a URL to your MuleSoft application (Mule app) that will run a specific logic – in this case, sending a message to our channel using the Webhook.
So let’s go create our Mule app to get the Request URL we need here.
Creating our first Mule App
To create Mule apps, you’ll need access to the Design Center and permission from your administrator. If your company doesn’t provide access to these, you can create a free account for learning purposes.
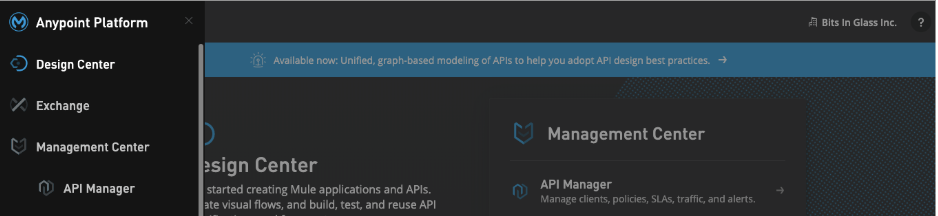
From the side menu in your Anypoint Platform, go to the Design Center.
Select Create and then Create a new Mule application.

Write your project name, and click Create.

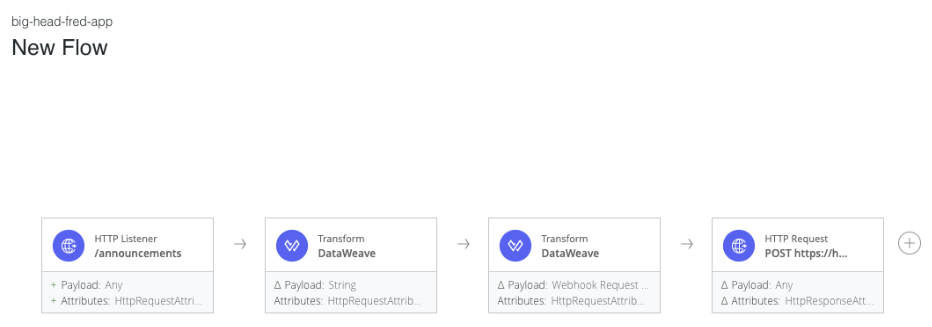
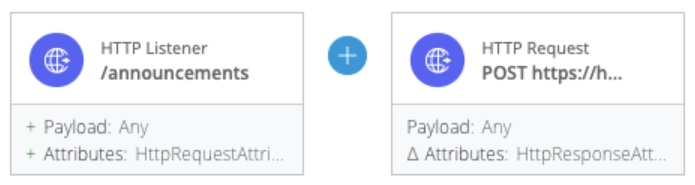
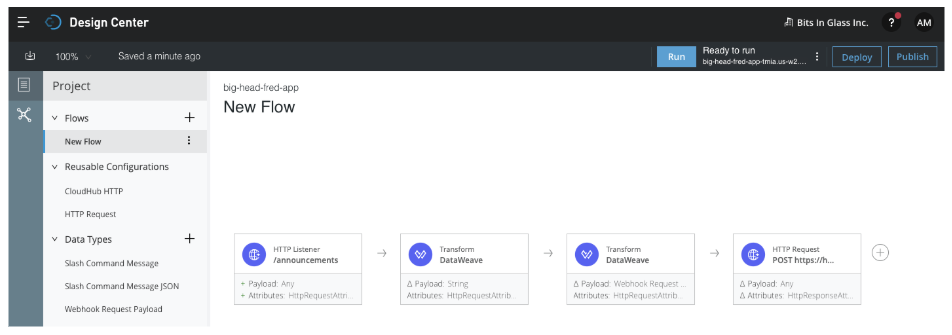
Components are the main building blocks of Mule apps. It’s a simple term used to refer to the “cards” or “little squares” you can see on any Mule flow. Below you can see an example of a simple flow with 4 components:
You can learn more about components here.
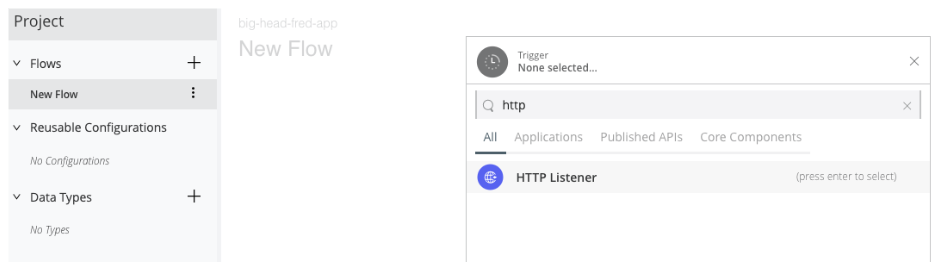
Click on the component to create a Trigger and select HTTP Listener.
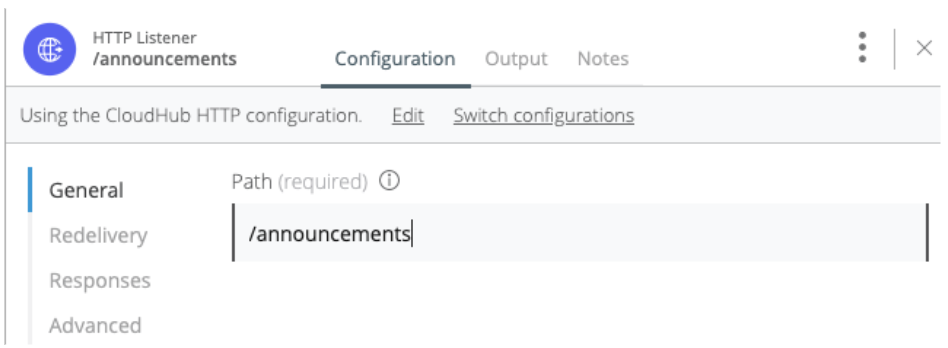
Write the path that you want to use for your app. I wrote “/announcements” since my application will be used for sending announcement messages in our staff Slack channel. You can then close the window.
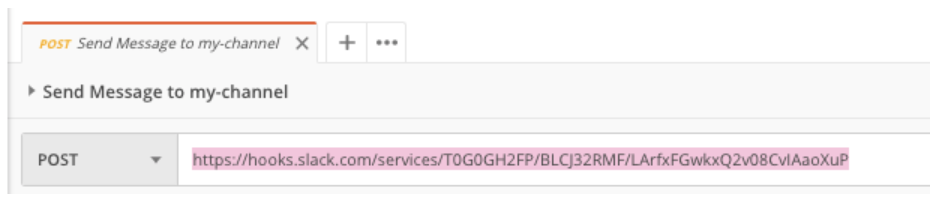
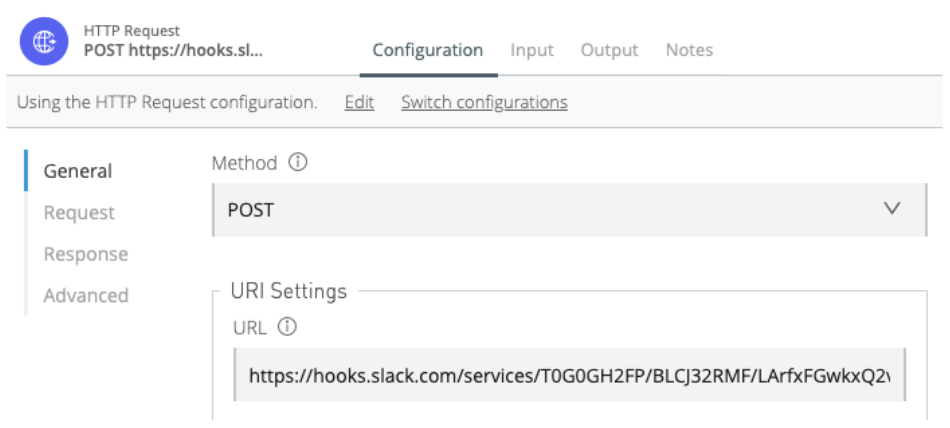
Now, select the plus (+) sign after HTTP Listener to create a connector after this. We’ll be creating an HTTP Request to our Webhook, which is essentially just replacing the manual step we previously did in the last post using Postman.

We’ll configure the same information we previously had in Postman.
 Now, here comes the fun part! This is our flow so far:
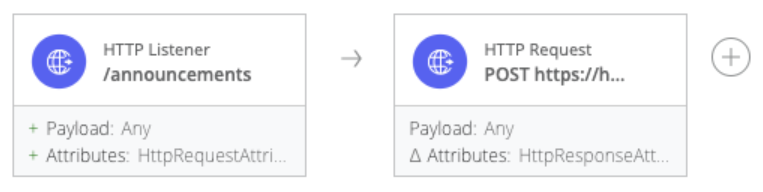
As you can see, this flow is only taking the data it receives (from the Slash Command) and forwards it to the HTTP Request to our Webhook, to post a message to our Slack channel.
But, how do we know we’re actually receiving a JSON data type? (Remember that our Webhook only allows JSON types in the Request).

If we go to Slack’s API Documentation, we can see how Slash Commands work: https://api.slack.com/slash-commands
If you go to “Preparing your app to receive Commands”, you’ll be able to see the actual message that the Slash Command sends to our Mule application.
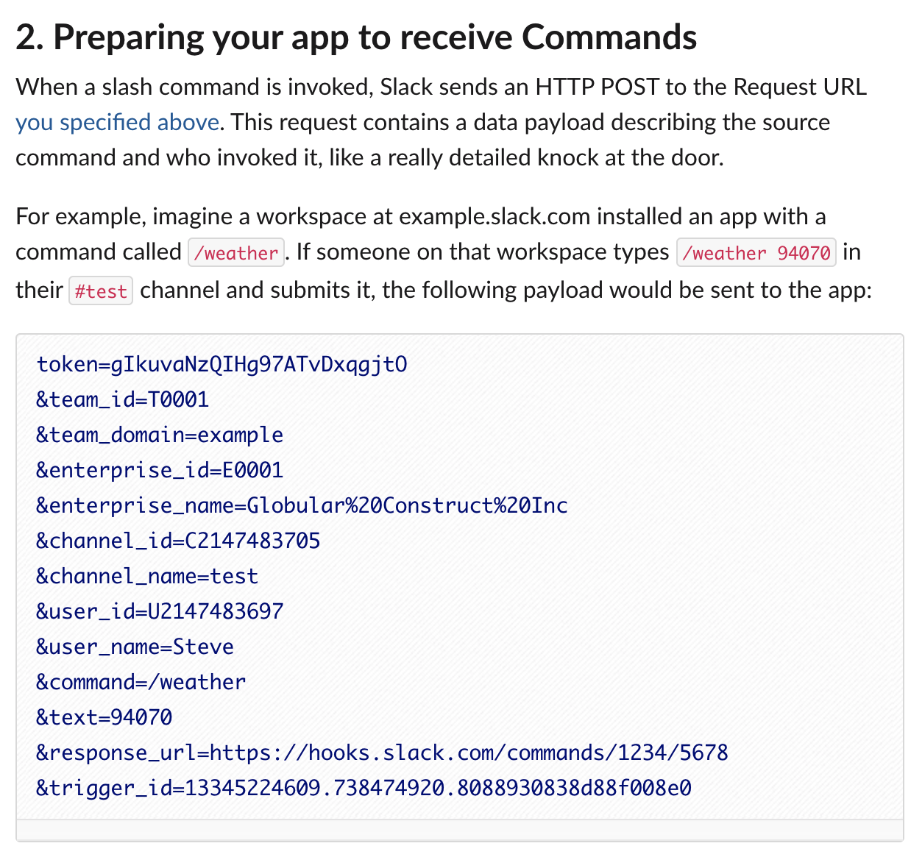
This is not a JSON message at all!
But what’s great for us is MuleSoft created a component called “Transform” that we can use for these kinds of data transformations. We’ll see it in action for this exercise.
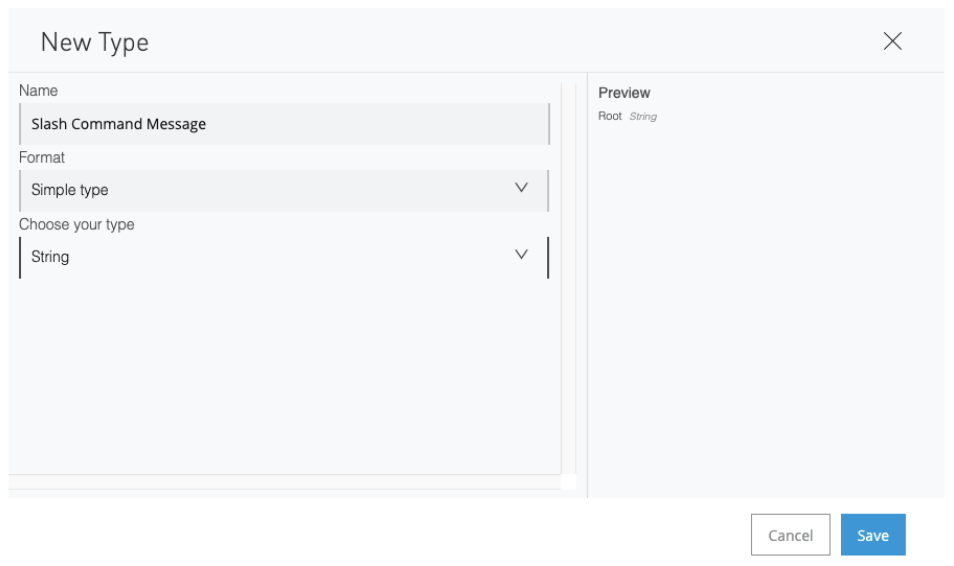
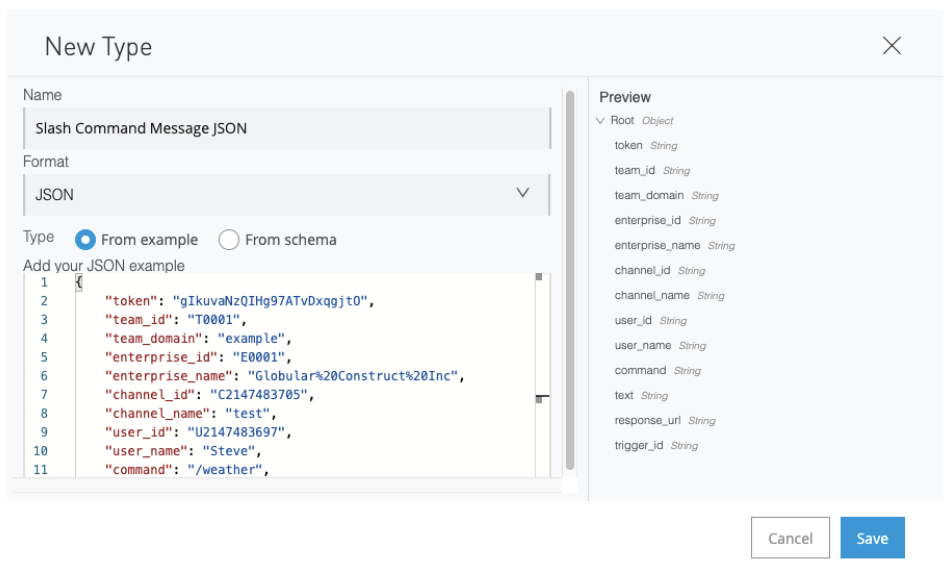
Now that we know how the data will look like, let’s go back to the Design Center and create a new Data Type.
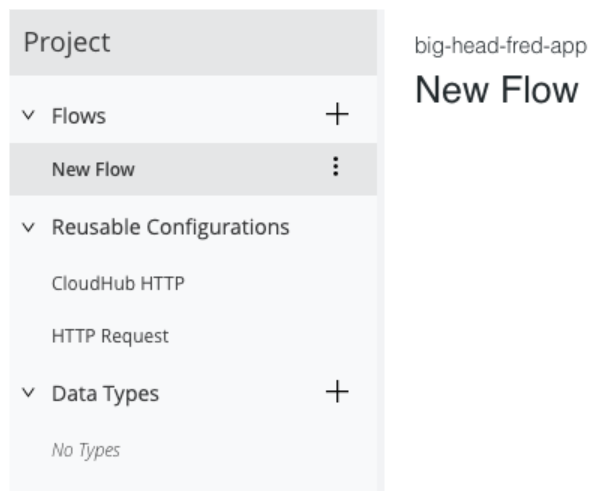
Let’s call this “Slash Command Message” and create it as a String. Click on “Save”.
Let’s also create a new Data Type for our Webhook call. We already tested this using Postman, so we know the structure for it. It’s in a JSON Format, and contains a field called “text”. We can use our Postman Request to copy and paste the body into our new Data Type in Design Center.

Now we can start using the Transform component. Hover your mouse in between the two HTTP components and a plus sign (+) will appear where the arrow was.
Click on the plus sign (+), search for “Transform” and select it.
 Note that there are three dots beside the Input Payload. Click on them and click “Set”.
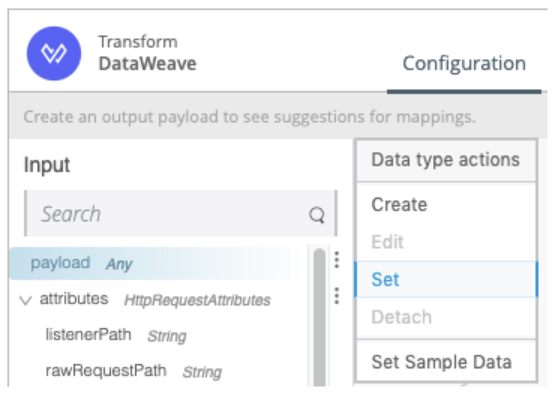
Select our previously created “Slash Command Message”. Now click on “Sample data” and paste the same example we saw in https://api.slack.com/slash-commands. You can copy and paste from the following text:
token=gIkuvaNzQIHg97ATvDxqgjtO
&team_id=T0001
&team_domain=example
&enterprise_id=E0001
&enterprise_name=Globular{982924e26b728d6bee9b2e98d8d77350a8657cb0c945e2162fc618bd8dfd1bea}20Construct{982924e26b728d6bee9b2e98d8d77350a8657cb0c945e2162fc618bd8dfd1bea}20Inc
&channel_id=C2147483705
&channel_name=test
&user_id=U2147483697
&user_name=Steve
&command=/weather
&text=94070
&response_url=https://hooks.slack.com/commands/1234/5678
&trigger_id=13345224609.738474920.8088930838d88f008e0
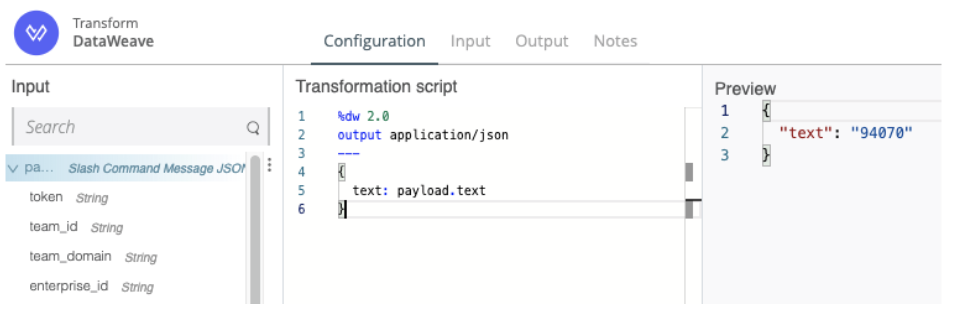
 Go to Script and change “application/java” to “application/json”. Also change “null” to “payload”.
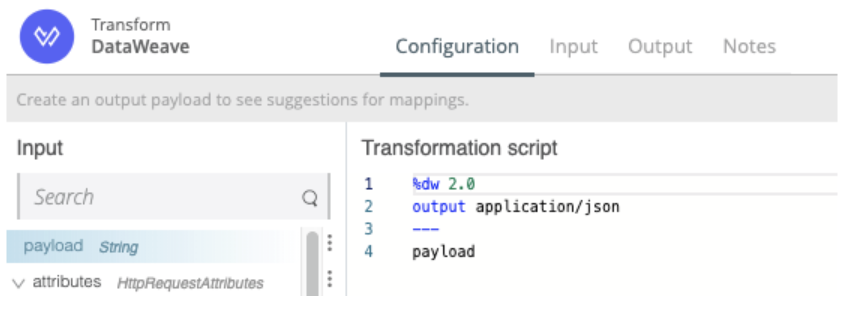
This previous step is only transforming our input payload (which was in the format we saw on Slack’s documentation) to a JSON format.
It will generate something like this:
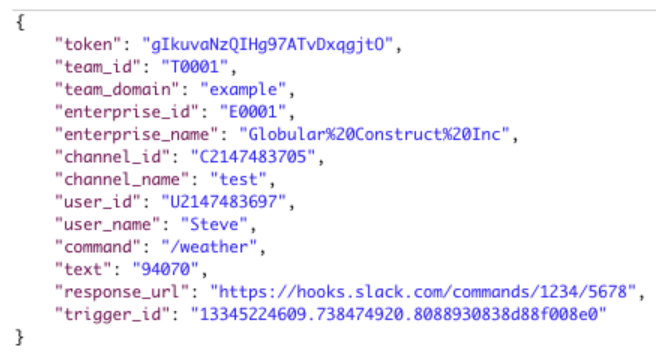
We’re not done yet, since all we want is what’s in the “text” field (what we send in Slack when we call the Slash Command).
We need to create a new Data Type for this JSON format we just transformed. You can copy and paste this text:
{
“token”: “gIkuvaNzQIHg97ATvDxqgjtO”,
“team_id”: “T0001”,
“team_domain”: “example”,
“enterprise_id”: “E0001”,
“enterprise_name”: “Globular{982924e26b728d6bee9b2e98d8d77350a8657cb0c945e2162fc618bd8dfd1bea}20Construct{982924e26b728d6bee9b2e98d8d77350a8657cb0c945e2162fc618bd8dfd1bea}20Inc”,
“channel_id”: “C2147483705”,
“channel_name”: “test”,
“user_id”: “U2147483697”,
“user_name”: “Steve”,
“command”: “/weather”,
“text”: “94070”,
“response_url”: “https://hooks.slack.com/commands/1234/5678”,
“trigger_id”: “13345224609.738474920.8088930838d88f008e0”
}
 Let’s add a new Transform right after the one we just created. This time our input payload will be the JSON Data Type we just created.
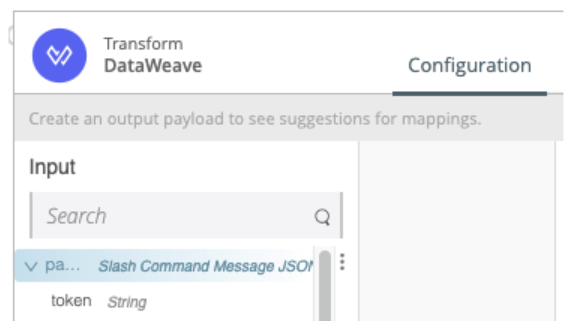
In our output payload, we’ll set the expected format we want to send to our Webhook call, so we’ll select our previously created “Webhook Request Payload” Data Type.
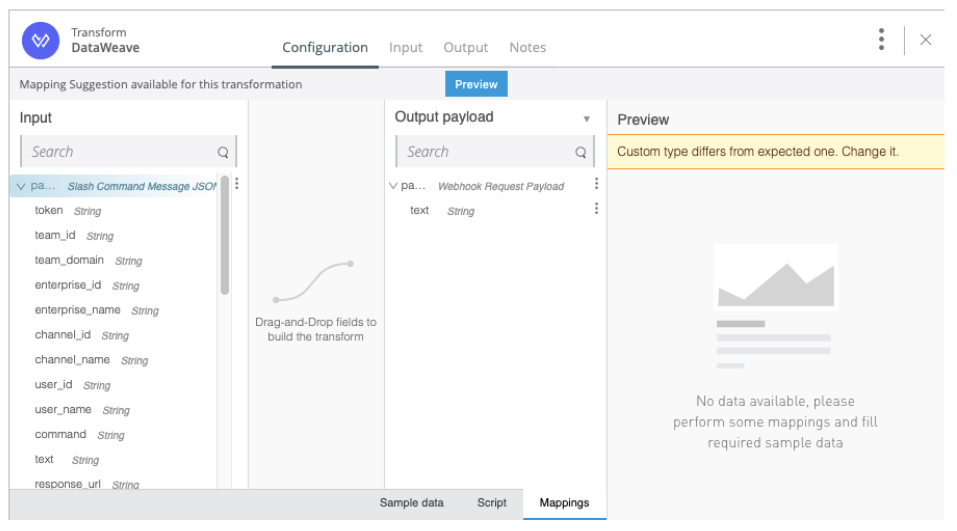
Here’s the cool part. If you drag the “text” field from the left and drop it on the “text” field on the right, you’ll be creating a mapping. This is the best functionality that the Transform component offers. You can manipulate several data types and transform them as you need, just by drag-and-dropping.
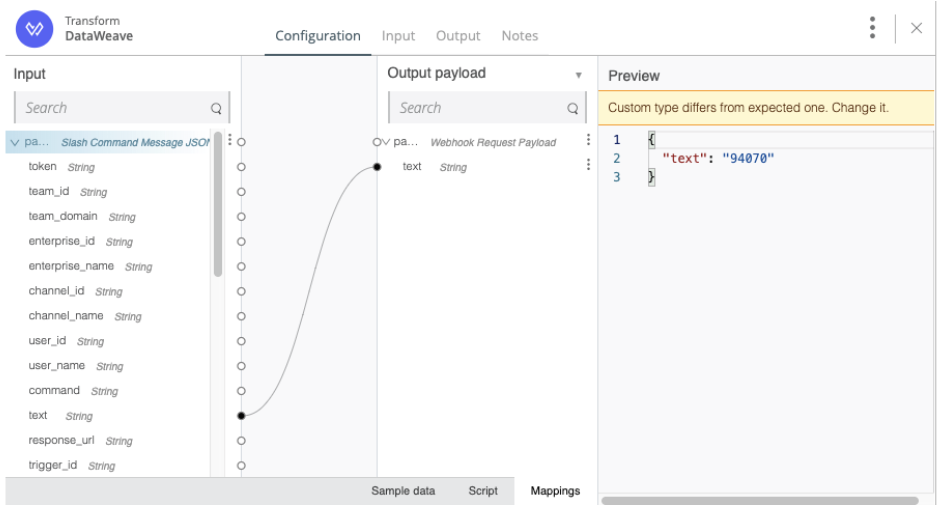
You’ll notice there’s a warning. This is because the tool knows that you are trying to get a JSON format as the output, but your script was set as “java” instead. Go to the “Script” tab and change from “application/java” to “application/json”. Now we’re all set!
Testing your integration
Click on the blue “Run” button at the top to start your application.
Copy the link to connect to your Mule app.
Go back to your Slash Command, paste your link, and attach your Mule HTTP Listener path at the end of the URL. Your Request URL should look something like this:
http://big-head-fred-app.cloudhub.io/announcements
Remember to check the “Escape channels, users, and links sent to your app” option if you want to be able to call Users or Channels within your messages.
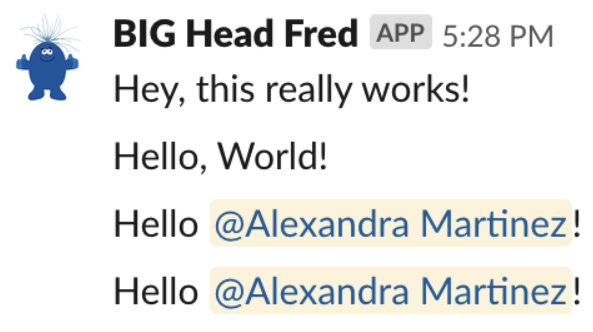
Go back to your channel and write “/big-announcements Hey, this really works!”

You will immediately see the same message being posted by your Slack app.

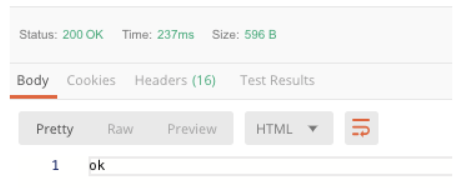
This is doing exactly what we previously had done using Postman. What do you think that “ok” means?
It’s our Webhook response! We also saw it when we used Postman, remember?
I can call this Slash Command from any conversation and it will always post to that channel, because that’s what I had set in my Incoming Webhook.

 Well that was scary, huh? But, hey, we made it! Now we don’t have to use Postman to send messages to our channel, AND you got to create a MuleSoft application for your own integration! Congratulations!
Now you can see why Slash Commands are very useful and can help you save time. It lets you trigger an interaction with your app directly from any message box in Slack. You don’t even have to be on the same channel or conversation. Now go and have fun with your Mule and Slack apps!
Below are some links for you, if you want to learn more about MuleSoft and Slack apps:
- MuleSoft Documentation for Mule Apps
- An introduction to Slack Apps
- Slack Documentation for Incoming Webhooks
- Slack Documentation for Slash Commands
About the author

Made in Mexico, Alexandra enjoys learning new technologies and is always looking for new challenges. She loves statistics because she’s bad at them, so they keep her alive (an eternal challenge). Her natural habitat, however, involves watching Netflix and playing video games.